
*Click photos to make larger*
First off you are going to want to have some textures downloaded. I get most of my textures (which are free) from Shadow House Creations. Find a few that you like and save them somewhere you can easily find them.

Copy the texture (shortcut command C) and then go to your image and paste it (command V).

Grab one corner of the texture, hold down SHIFT and start to drag it towards the corner of your photo.
The texture may not fit the photo exactly. If needed let go of shift and just align the texture with all four corners of the photo. Or if you don't want to distort the texture you can keep holding down SHIFT and pull the texture out until it lines up with the photo. By choosing the second option you will lose part of the texture. Another option is to crop your photo.
You can also just go to the Layers window on the right side of the screen to change blending options.


Now you just need to choose the blending option you like best. Play around with the Fill and Opacity if the effect is too light/dark.

Now select a photo you want to apply the texture(s) to. Open it in photoshop. Open the texture(s) you want to apply. I will be using this image.

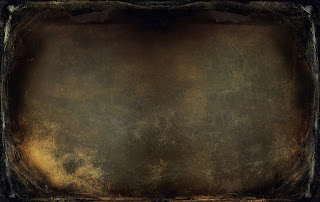
In Photoshop go to texture image. In this case I'll be using Archaic Frame.

Copy the texture (shortcut command C) and then go to your image and paste it (command V).
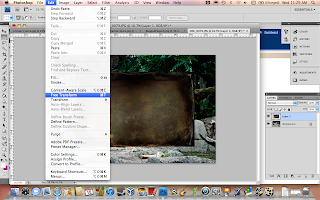
Chances are the texture is smaller than the photo, so we need to transom it.

Go to edit > Free Transform (command T).

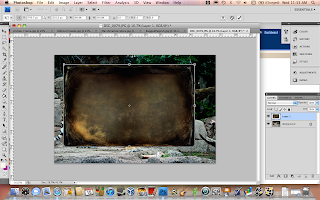
Grab one corner of the texture, hold down SHIFT and start to drag it towards the corner of your photo.

The texture may not fit the photo exactly. If needed let go of shift and just align the texture with all four corners of the photo. Or if you don't want to distort the texture you can keep holding down SHIFT and pull the texture out until it lines up with the photo. By choosing the second option you will lose part of the texture. Another option is to crop your photo.
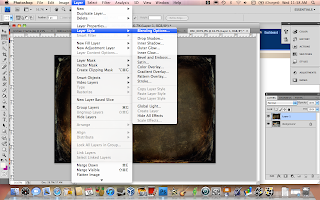
Now you should NOT be able to see your photo at all because it is behind the texture. Now we need to edit the blending option to make the photo visible. Go to the Layer Tab > Layer Style > Blending Options.

You can also just go to the Layers window on the right side of the screen to change blending options.


Now you just need to choose the blending option you like best. Play around with the Fill and Opacity if the effect is too light/dark.

No comments:
Post a Comment